Category: Flooring

Updating Your Kitchen With Hardwood Flooring

Should I Choose Engineered or Solid Hardwood Flooring?

When you’re searching for the perfect wood flooring for your property, you’ll undoubtedly come across two distinct types. Engineered wood flooring and solid hardwood flooring are both wonderful options in their own way, sharing many of the same great benefits of wood flooring.

However, there are a few differences in how the flooring is made and how it performs, which make either engineered or solid hardwood flooring better for different rooms.

WHAT’S THE DIFFERENCE?

Solid hardwood flooring is typically around 19mm thick – or ¾ inches – and is cut entirely from one piece of wood. In contrast, engineered wood flooring comprises a thinner piece of hardwood on top of a thicker base of plywood. The hardwood itself is around 3-7mm (0.1-0.3 inches).

As a result of this difference in structure, one of the key differences is sanding. While solid hardwood flooring can be sanded time and again, engineered wood flooring is restricted to being sanded once or twice.

Additionally, solid hardwood flooring is usually available in a wider choice of wood types compared to engineered wood flooring. However, engineered wood is easier to install than hardwood flooring as it has a greater range or installation methods.

That said, a professional installation team is always recommended for both options to get the best results.


Engineered Wood Flooring

With boarded flooring we would usually recommend going for engineered wood flooring. While there isn’t much cost difference, it will reduce the chances of having problems with the floor in the future. Because of its plywood base, there is much less chance of movement over time with engineered wood flooring.

Similarly, for kitchens and bathrooms, engineered is usually the better option. The plywood base has interlocking fibres, giving it a more stable structure than natural solid wood. As a result, it warps much less when it comes into contact with moisture, which can be a frequent occurrence in kitchens and certainly in bathrooms.

Solid Hardwood Flooring

On the other hand, if you were choosing a parquet floor, we would go for solid hardwood flooring. Solid blocks can be quite a bit cheaper and, as they are always glued down with flexible adhesives, they will allow the floor to breath without gaps appearing or blocks coming out.

That said, you would be better off with engineered wood flooring if you’re pairing it with underfloor heating. Similar to the above, the stable structure of engineered wood flooring makes it a better match with the heating and cooling that comes with underfloor heating, with less susceptibility to movement.


Where Can I Install Hardwood Floors?

Solid hardwood expands and contracts in reaction to changes in moisture and temperature, so solid wood floors are only recommended for rooms at ground level or above.

Engineered wood is suitable for most rooms in the home, including the basement or bathrooms. The unique construction of engineered wood creates a structure that is less likely to buckle, gap, or react to fluctuations in humidity and temperature.

DIY vs. Pro Installation

Solid hardwood flooring can be glued, nailed or stapled to a wood subfloor. These types of installations are best left to the pros, since they can challenge even experienced DIYers.

Engineered wood floors can be either nailed down or glued down, like a traditional hardwood installation. They can also be installed as “floating” floors, in which the boards attach to each other and “float” above the subfloor.

DIY Hardwood Installation

Solid hardwood flooring installation is perhaps the most challenging of all flooring types. However with the right tools and planning skilled DIYers can handle the job with stunning results. Engineered hardwood flooring is an easier and faster DIY installation.


The character of hardwood.

Know the difference.

There are major differences between solid, engineered and hybrid hardwood floors. The main difference is their structural composition which determines where in your home it’s best installed.

Solid hardwood is constructed from one solid piece of 100% hardwood. It is known for its durability, authenticity and timelessness. Solid hardwood can be sanded and refinished numerous times. Not recommended for below grade.

Engineered hardwood is made of layers with 100% natural wood on top, wood on the bottom, and a highly stable core in the middle. The core consists of layers pressed together in a crisscrossed pattern. It’s what makes engineered hardwood less likely to shift, expand or contract when exposed to environmental changes in temperature, moisture and humidity. Engineered can be installed on, above or below grade.


Refinishing Hardwood Floors

Both engineered and solid hardwood flooring can be refinished. Solid hardwood can be refinished up to 10 times depending on the board thickness. Engineered boards requires less refinishing over its lifetime – typically only one or two times.

Refinishing your hardwood floors can be a DIY project, but it requires some skill and a bit of patience. Equipment rental can range between $200-$300 dollars.

Price difference

In terms of look and feel, you truly can’t see a difference between the engineered and solid, and there is no discernible distinction to the touch. In the case of expense, it depends on the plank size, cost of the wood being used, shipping and installation fees, so that’s where the fees may differ.

Because their look and feel are virtually identical, typically the choice between solid and engineered wood comes down to price and climatic conditions. Jordans Flooring Consultants can talk you through what the right product for you is depending on your needs and budget. Find a store near you today.

Unfinished Oak Hardwood Flooring Pros And Cons

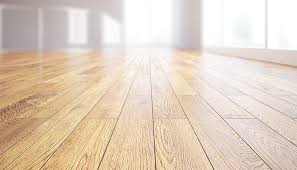
How to Clean Engineered Wood Floors

For floors that add immediate warmth to a room without compromising on character, engineered floors are high quality, durable and incredibly easy to clean. Not to be confused with laminate flooring, engineered wood floors are the flooring type for the future: they sport the look and feel of real hardwood, without the disadvantages of cost and restrictions of placement. Engineered wood flooring is made up of a combination of laminate and hardwood, formed of a series of high-density layered fibres. This layering technology gives these floors greater support, meaning that they can tolerate greater fluctuations in temperature and moisture levels.

Whether you’ve already taken the plunge, or are just browsing, if you’re are worried about how to maintain your new engineered wood floors, let us put your mind at ease. To keep your wood floors looking like when they were first installed, all you need to do is follow a few simple steps: mop up spills immediately, stick to a regular cleaning schedule and use the right cleaning agents.

THE BENEFITS

There are numerous benefits to installing engineered wood flooring as opposed to solid hardwood floors, lower cost being a significant one. Engineered wood floors are incredibly budget-friendly, and come in a variety of colours, finishes and board sizes. This means that you often have more options than if you chose a solid hardwood floor type. Engineered flooring is extremely long-lasting, made from multiple solid layers that give the floorboards the strength and finish of solid hardwood. These floors can also be re-sanded up to two or three times, and then re-varnished or lacquered, to remove signs of unsightly stains and scrapes.

PREVENTING MOISTURE

One of the most common problems associated with wood flooring is moisture. Because wood is a natural material, it expands and contracts in response to levels of moisture in the air. This can lead to unsightly cracks and blemishes in the wood, and even buckling in some cases. While engineered wood flooring does not carry the same risk as solid wood, it still sports a hardwood upper and so care must be taken when it comes to maintenance.

REGULAR MAINTENANCE

Keep your floors looking as good as new by implementing a consistent cleaning routine. Sweep floors three or more times a week to remove debris and prevent scratches. Always sweep your wood floors before you mop for ultimate cleaning. Try to properly mop your floors at least once a week.


Tools For Hardwood Flooring Installation

While the number of tools is considerable (more than 50, according to the National Wood Flooring Association), here’s a list of 24 essential hardwood floor installation tools every flooring contractor should have on hand when installing a hardwood floor. Although some of these tools are also used during sanding and finishing, our emphasis is on installation

Safety Goggles

Eye injuries can occur when you least expect it. You never know when a piece of wood or metal or a bead of finishing material will hit you in the eye causing temporary or permanent damage. It’s why OSHA (Occupational Safety and Health Act) regulations require eye protection when using most power tools

Dust Mask and Vapor Respirators

Sanding or applying finish requires the use of a respirator. Failure to use one can cause inflammation of the nasal tract, tightness of the chest, shortness of breath, dizziness, asthma, and mucosa irritations

Ear Plugs or Ear Muffs

Prolonged exposure to loud noise, especially when using certain types of power equipment, can result in hearing loss. According to the Centers for Disease Control, the noise levels from a wide variety of power saws are over 100 decibels, which makes them dangerous to your ears after just two minutes! Many flooring professionals today have 30 to 70 percent hearing loss because they weren’t aware of audio hazards. Earplugs are easy to use and inexpensive. They come either as foam inserts or pre-molded plugs. If you’re concerned about earplugs getting lost in your ears, there are earplugs called “semi-inserts” that have a band or string connecting them together. Foam inserts are rolled and compressed into tiny cylinders that slowly expand inside the ear once inserted. Pre-molded plugs are reusable, flanged plugs that you insert into the ear. Foam inserts come in different ratings, so make sure to get the proper inserts.

Knee Pads

Since you will be spending some of your time on your knees, knee pads will prevent strain and pain. Use contractor-grade pads, made of cloth, that are adjustable and fit well. Since they come with a soft non-marring outer surface, they will not damage floors like hard plastic or metal versions. There are also ergonomic type knee pads containing fluid that offer considerable comfort.


Choosing the Best Color of Hardwood Floor for Your Home

When you’ve made the decision to install hardwood floors in your home, you might think that choosing a color (or rather, a specie) will be the easy part, but when it comes down to it, choosing hardwood floors can be a difficult choice. That said, there are a few different things to know and consider when choosing a shade that can make the process less overwhelming.

Know that the Wood Can Shift in Color Over Time

If you love the look of unstained hardwood floors, it’s important to know that the wood can take on the color present in the clear coat you use. For instance, if you use an oil-based polyurethane or tung oil, the floor will take on a more golden hue. In a similar vein, if you choose very dark wood floors, it’s essential to make sure they are UV-resistant if they’ll be exposed to sunlight, otherwise over time the color can fade dramatically.

Keep in Mind the Rest of Your Décor

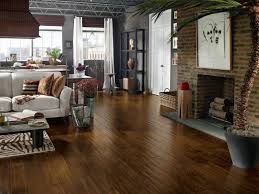
If your appliances or furniture and trim are dark colors, putting in dark hardwood floors can make the rooms look very small and cramped, so if you want to make your home appear bigger, it’s important to keep that in mind. Likewise, light colored flooring, when paired with lighter furniture and fixtures creates a very modern, contemporary look, so if you want something more classic or vintage looking, that can be taken into consideration. In the same category, think about the colors of your walls, and any potential repainting projects you might do. Some floors will not look good with some colors on the wall, so if you plan on ever repainting, making sure that the flooring option you choose is a versatile one for matching to the walls will be important. Matching the floors so they complement your cabinets and architecture is important, and if you’re having trouble, talking to a designer can help.

Take Floor Samples Home With You

When you’ve narrowed down your choices to a few, bring home a few samples from a showroom. Try to keep your decision to be between three shades, as more than that can cloud your decision-making process by making it more complicated. Keep in mind that some species of hardwood flooring are more expensive, while less expensive types can be stained to look like other species of wood. Be sure to look at the samples in all types of daylight and artificial light to see what the flooring looks like at nighttime, for instance. Leave the room and come back in, and note your reaction to each sample. After you can make a decision about which of the three is your least favorite, take that one out of the running and repeat until you make the ultimate decision.

Consider the Durability of Certain Species

Beyond color, the type of wood matters, as well—certain species are harder and will be able to stand up to potential damage more than others, so if you like a certain color—such as pine—it’s important to know how strong it is. If the durability is not enough for your home’s needs, certain colors may not be best for your house.


Things to Consider When Installing Wood Floors in Dry Climates

Then after some education about wood floors and our unique environment, the answer is of course, “Yes, you can!” I am sure that everyone has had similar experiences of misinformation. There are just some things that you need to pay close attention to in order to ensure success. It is really no different from installing in other regions. All regions have unique requirements for successful wood floor performance.

Acclimation

do experience humidity, but it happens during our hottest time of the year when HVAC units are running nonstop pulling moisture from our air. This makes us relatively stable compared to other areas of the country that can range from virtually no relative humidity to 100 percent relative humidity seasonally.

Species

Not all wood species enjoy a dry environment. This is much more prevalent when dealing with engineered wood floors, but some species don’t perform as well as others

Engineered Versus Solid

have a predominantly slab market. So we install an immense amount of engineered flooring. Most of what we install is unfinished engineered. Once installed we treat it exactly the same as a solid unfinished wood floor. Some of the benefits are increased dimensional stability, no need for subfloor, and exceptional milling tolerances.

As great as they are, some engineered floors just don’t handle the dry environment well. The failures are caused from many different issues. Some engineered floors fail due to the species or the way the product is constructed. Distress in the form of delamination, surface checking, and splitting are quite common.


HOW TO INSTALL ENGINEERED HARDWOOD FLOORING

My. Goodness. YOU GUYS. Is it possible to fall completely in love with your hardwood flooring?! Because that’s totally happening rightthissecond. Our new hardwood floors look SO GOOD!!! If you recall, we had three different types of flooring on the main floor of our home: dated honey oak hardwood, builder-beige carpet, and dark laminate (my least favorite thing in the world) that was installed over ceramic tile (okay, that’s technically four different types of flooring). I’m not sure why there were so many different floor choices to begin with, but I’m a big fan of a cohesive, seamless look throughout. Replacing the mismatched floors was one of the things we wanted to do as soon as we moved into this house. I’m thrilled to partner with The Home Depot on this hardwood flooring project!

I researched a ton of different flooring options, from vinyl plank to tile. I talk more about why I chose engineered hardwood in this post. While all wood floors expand and contract due to changes in temperature and humidity, engineered hardwood is more stable than solid wood floors because of the way it’s constructed. Engineered hardwood is made up of layers of real hardwood and high-quality plywood, each layer positioned in opposite directions. This makes for a more stable product, so the wood will less likely warp and bow in moist or humid conditions. This is especially important in rooms where moisture might be an issue, like a kitchen, bathroom, or laundry room.

rented a house with dark wood floors and it showed every dust particle and dog hair, it was next to impossible to keep clean. I vowed never to have dark floors again, so when I laid eyes on this wide plank French oak hardwood flooring

this flooring can be installed as a floating floor (not nailed or glued) or it can be glued down. We chose to float the floor just for ease of installation (and because I’m a bit of a commitment-phobe). It can be installed on, above, or below grade and no acclimation is required. I love that it comes in various lengths, with 70% of the planks being 48 inches long.

This flooring comes with click lock construction, so installation is a breeze. Each piece fits together like a puzzle; you shouldn’t have to wrestle with the floorboards to get them to lay flat and lock into place. Once you lay the tongue in the groove, it should click, lock, and fit like a glove.

Must Know Tips To Maintain Laminate Flooring

HOW TO MAINTAIN AND RESTORE LAMINATE FLOORS

Laminate floors give a different look to your home or office. These floors are durable and resistant to stains. If you use the proper laminate cleaning products and methods, they can be cleaned and maintained easily.

Here are some general floor cleaning tips for these types of floors:

Sweeping Laminate Floors:

Sweep the laminated floors daily with a soft-bristled broom. That will prevent the scratches.

Vacuum Cleaning Laminate Floors:

It is convenient and vital to vacuum clean the laminate flooring frequently to remove loose dust and dirt. The dust has abrasives that can cause scratches.

Wet Mopping Laminate Floors:

A damp mopping is recommended to clean the laminate floors once in a week or less. You can use a soft microfiber mop. Always mop along the lines of the floor planks. Dry and clean the floor with soft microfiber mops. Make sure only to use a damp mop as water can harm the laminated floors. It is advised only to use the recommended laminate cleaning products to clean your floors.


Keeping Laminate Clean and Shiny

Sweep or vacuum regularly. Dust and dirt can make your floor look dirty, and they can also cause scratches. Sweep or vacuum the floor at least once a week, and more often if you have kids, pets, or a particularly active house.

  • When you vacuum, always use the hard floor attachment.

Mop regularly with the right cleaner. Mop the floor at least once a week after you vacuum. Work in small sections by spraying cleaner directly onto the floor and wiping with a microfiber mop. To maintain the shine, use a commercial or homemade cleaner that’s specifically formulated for laminate.

  • To prevent dullness, don’t use cleaners that contain soaps, oils, or harsh chemicals.

Use floor mats at entrances. Floor mats aren’t just good for welcoming guests to your house, and they’re also designed to catch dirt, mud, dust, moisture, and other particles that might get dragged in from outside. Using mats at entrances will help keep your floor cleaner, and reduce how often you have to sweep and mop.

Clean spills immediately. Laminate floor is very durable, but it’s not meant to get wet. As soon as food spills on the floor, pick up solid waste with a spoon or a towel. Wipe up any liquids, puddles, or spills that end up on the floor with a cloth or towel.

  • Laminate that stays wet for too long can warp or be otherwise damaged.


Why It Matters How You Mop Your Floor

The North American Laminate Flooring Association points out the benefits of this type of floor.

For one, it’s environmentally friendly because it’s made from sustainable wood and wood byproducts.

Two, it’s available in a wide variety of styles and colors for every room in the house And three, it’s surprisingly durable. Laminate is stain, scratch, and moisture-resistant. Plus, most manufacturers offer at least a 10-year warranty.

You don’t even need to wax or varnish laminate to keep it looking like new. But here’s the hard part: it does matter how you mop your laminate floor.

Soaps and abrasive cleansers will destroy the finish. So will homemade cleaners if they aren’t properly diluted. Also, some popular cleaning liquids leave residue and streaks. Worse, leaving the floor wet can cause it to warp and peel.


Cleaning Laminate Floors with Vinegar

Thought I would share some tips if you have laminate flooring in your home. I find these tips helpful and found then off a website where I bought my steam cleaner. If any one else has any tips please let me know or share here.

If you are trying to maintain you laminate floor here are some maintenance tips

1) Becareful with the laminate floor cleaner that you buy. Lot of chemical based floor cleaners tend to leave behind residue and can make your flooring look dull. Invest in a steam mop so you can eliminate the need to use chemical cleaners and just steam clean your laminate flooring.

2) Sweep your laminate flooring on a daily basis to prevent dust and dirt from sticking to the surface. Sweeping on daily basis prevents you from alot of scrubbing and mopping in the future. prevents you from alot of future scrubbing and mopping.

3) Do not use soap or any other household cleaner to clean your laminate floors as they leave unsightly streaks. If you have spots or stains invest in a steam mop that will help lift the stains from the floor. A steam mop is more convientent to use when you have spills and spots.

4) When you spill anything wipe it up immediately since extend period of moisture absorption can damage your laminate flooring.

5) Do not wax your laminate flooring

6) Use natural cleaning ingredients like vinegar, baking soda, lemon and water. Natural ingreditent such as these can help maintain your home daily with out any chemicals. You can also use all these natural ingredients with steam mop so you have the power of hot steam to wipe away dirt and refreshen your home.


Making the best homemade cleaner for laminate floor

By now (thank the internet), you and I know that the best way to clean laminate floors (and save money) is by using natural ingredients at home.  Most of these ingredients are in the kitchen, and the best part is that they are safe. But, there’s the huge risk of using the wrong homemade ingredients leading to damage.

Baking soda mixed with water: baking soda is a magical ingredient that should be present in any home. It removes stains effortlessly and is nonabrasive.

Borax with water: mix these two and then spray on your microfiber mop to clean the floors. Be careful about the amount of water you use and wipe surfaces dry when done.

Vinegar and warm or hot water: The most popular homemade cleaning solutions for laminate floors and other surfaces, it has been in use for centuries. The best part: vinegar is affordable, and it lasts a long time. Mix the two in equal parts, put in a spray bottle (or a mop bucket), and get to work.

Vinegar, lemon juice, and water: besides the citrusy scent and the antiseptic properties of the lemons, this mixture will leave your floors streak-free. And even if you cannot stand the smell of vinegar, note that it dissipates quickly – you may add a few drops of your favorite essential oil to the vinegar-water mixture as well.

The only catch when adding essential oil is that it will reduce the floor’s shine.

Vinegar, water, and liquid dishwashing detergent in a spray bottle. This mixture will work magic on your high gloss laminate floors. As one of the best recipes for homemade laminate flooring cleaners, you need 3 parts water, one-part vinegar, and 1 squirt of dishwashing detergent.

Pencil eraser: You did not see this one coming, did you? Well, besides being an invaluable resource in school, you could use it to remove scuff and heel marks on the floor.

To remove gum or candle wax, cover the area with ice, let it freeze, then scrape it off gently with a non-abrasive plastic scraper.