Updating Your Kitchen With Hardwood Flooring

Should I Choose Engineered or Solid Hardwood Flooring?

When you’re searching for the perfect wood flooring for your property, you’ll undoubtedly come across two distinct types. Engineered wood flooring and solid hardwood flooring are both wonderful options in their own way, sharing many of the same great benefits of wood flooring.

However, there are a few differences in how the flooring is made and how it performs, which make either engineered or solid hardwood flooring better for different rooms.

WHAT’S THE DIFFERENCE?

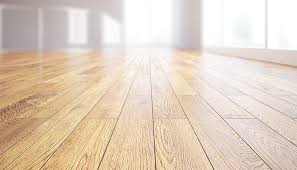
Solid hardwood flooring is typically around 19mm thick – or ¾ inches – and is cut entirely from one piece of wood. In contrast, engineered wood flooring comprises a thinner piece of hardwood on top of a thicker base of plywood. The hardwood itself is around 3-7mm (0.1-0.3 inches).

As a result of this difference in structure, one of the key differences is sanding. While solid hardwood flooring can be sanded time and again, engineered wood flooring is restricted to being sanded once or twice.

Additionally, solid hardwood flooring is usually available in a wider choice of wood types compared to engineered wood flooring. However, engineered wood is easier to install than hardwood flooring as it has a greater range or installation methods.

That said, a professional installation team is always recommended for both options to get the best results.


Engineered Wood Flooring

With boarded flooring we would usually recommend going for engineered wood flooring. While there isn’t much cost difference, it will reduce the chances of having problems with the floor in the future. Because of its plywood base, there is much less chance of movement over time with engineered wood flooring.

Similarly, for kitchens and bathrooms, engineered is usually the better option. The plywood base has interlocking fibres, giving it a more stable structure than natural solid wood. As a result, it warps much less when it comes into contact with moisture, which can be a frequent occurrence in kitchens and certainly in bathrooms.

Solid Hardwood Flooring

On the other hand, if you were choosing a parquet floor, we would go for solid hardwood flooring. Solid blocks can be quite a bit cheaper and, as they are always glued down with flexible adhesives, they will allow the floor to breath without gaps appearing or blocks coming out.

That said, you would be better off with engineered wood flooring if you’re pairing it with underfloor heating. Similar to the above, the stable structure of engineered wood flooring makes it a better match with the heating and cooling that comes with underfloor heating, with less susceptibility to movement.


Where Can I Install Hardwood Floors?

Solid hardwood expands and contracts in reaction to changes in moisture and temperature, so solid wood floors are only recommended for rooms at ground level or above.

Engineered wood is suitable for most rooms in the home, including the basement or bathrooms. The unique construction of engineered wood creates a structure that is less likely to buckle, gap, or react to fluctuations in humidity and temperature.

DIY vs. Pro Installation

Solid hardwood flooring can be glued, nailed or stapled to a wood subfloor. These types of installations are best left to the pros, since they can challenge even experienced DIYers.

Engineered wood floors can be either nailed down or glued down, like a traditional hardwood installation. They can also be installed as “floating” floors, in which the boards attach to each other and “float” above the subfloor.

DIY Hardwood Installation

Solid hardwood flooring installation is perhaps the most challenging of all flooring types. However with the right tools and planning skilled DIYers can handle the job with stunning results. Engineered hardwood flooring is an easier and faster DIY installation.


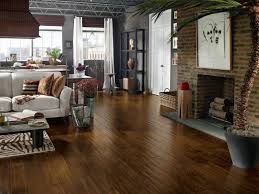
The character of hardwood.

Know the difference.

There are major differences between solid, engineered and hybrid hardwood floors. The main difference is their structural composition which determines where in your home it’s best installed.

Solid hardwood is constructed from one solid piece of 100% hardwood. It is known for its durability, authenticity and timelessness. Solid hardwood can be sanded and refinished numerous times. Not recommended for below grade.

Engineered hardwood is made of layers with 100% natural wood on top, wood on the bottom, and a highly stable core in the middle. The core consists of layers pressed together in a crisscrossed pattern. It’s what makes engineered hardwood less likely to shift, expand or contract when exposed to environmental changes in temperature, moisture and humidity. Engineered can be installed on, above or below grade.


Refinishing Hardwood Floors

Both engineered and solid hardwood flooring can be refinished. Solid hardwood can be refinished up to 10 times depending on the board thickness. Engineered boards requires less refinishing over its lifetime – typically only one or two times.

Refinishing your hardwood floors can be a DIY project, but it requires some skill and a bit of patience. Equipment rental can range between $200-$300 dollars.

Price difference

In terms of look and feel, you truly can’t see a difference between the engineered and solid, and there is no discernible distinction to the touch. In the case of expense, it depends on the plank size, cost of the wood being used, shipping and installation fees, so that’s where the fees may differ.

Because their look and feel are virtually identical, typically the choice between solid and engineered wood comes down to price and climatic conditions. Jordans Flooring Consultants can talk you through what the right product for you is depending on your needs and budget. Find a store near you today.

The Photographer’s Guide To Become A Wedding Photographer

What To Consider When Hiring Your Wedding Photographer?

You finally start planning the day you’ve always dreamed of. Your wedding day!! It’s a once in a lifetime event and everything should be perfect, don’t you agree?

It’s essential to hire vendors you fully trust and love. Especially when it comes to your wedding photographer. Not only is it important that you like his/her photograph style but you should also be at ease with your photographer’s personality.

Why? Well, let me tell you — you’ll spend almost the entire day with them. That’s why my first and most important advice is to always meet and interview your wedding photographer in person or at least talk to them via video call before you finally sign the contract.

Besides your memories, your wedding photographs will be the only way to relive and share your wedding day over and over again with friends and family. A photograph of your first look might be displayed on the fireplace or on your night stand to remind you of this special day.

So, I recommend you spend some time and thoroughly research the professional who will accompany you throughout your wedding day.

  1. Decide on the Photography Style first

Today, there is a wide range of photography styles. From light and airy to classic and timeless all the way to dramatic, dark and moody. Before you even start researching, ask yourself what style do you feel drawn to instantly.

Create a board on Pinterest and collect images you love most. Go through Instagram or Facebook and get inspired. Then think about what it is you like about those photographs. Do not only consider the colors but also the emotional and artistic feel of those images.

  1. Do your research!

As soon as you’ve narrowed down your wedding photographer short list, do your research. Read through recent reviews from newlyweds and how each photographer responded.

Check on Instagram, Facebook and Twitter as well and their interaction with followers. Carefully review the photographer’s websites and blogs and get a better idea of their work. All of this will tell you a lot about a photographer’s personality and sensibility and if they shoot the moments that are most important to you.

  1. Check the availability ASAP

You’ll want to reach out to your potential wedding photographer as soon as possible. Many photographers are booked up to two years in advance and it’s always heartbreaking if the photographer of your dreams is not available on your wedding day.

  1. Look at a full wedding gallery

The photographs you’ll see on a photographer’s website, blog or social media account most likely show their best work. Those are usually the photographs that were taken in a gorgeous location and in optimal lighting conditions. However, a wedding usually includes many changes in setting and light.

From the getting ready images inside a hotel room, to the ceremony photographs in bright sunlight to dancing pictures long after the sun has set. A wedding photographer should be able to handle all different kind of lighting situations and if the full wedding gallery looks cohesive you are on the right track.

  1. Know your Budget and compare Packages

To avoid any disappointments when you receive your wedding gallery, it’s important to understand what’s included in your photographers wedding package before you book. The price range can be huge and so are the options on what’s included and what can be booked on top in advance(?)

For example, some photographers include all images in your final wedding gallery and other photographers just promise a certain amount of wedding photographs and up-sell if you would like to purchase more. This might explain the price difference between two photographers. If you prefer getting all images of your wedding you might want to consider a photographer that includes all the pictures in your gallery right away.

You also want to make sure how many hours of photography coverage is included. A typical wedding day usually requires between eight and ten hours.

If your photographer includes an engagement session in your wedding packages, that’s a big plus. They are usually really interested in getting to know you better before your wedding and want to make sure your wedding day runs smoothly.


Your Must Know Questions Guide To Choose The Wedding Photographer That Is Perfect For You!

  1. When I will be able to see my wedding photos?

What are the turnaround times for wedding images and albums? Shockingly, I hear a lot of horror stories from brides that haven’t seen images even a year after their wedding!

My turnaround time is 2-4 weeks for images and a month for the wedding album, depending on when you approve the design. You also need to consider the size of the digital files, will you be able to make prints up to certain size or images will be a full resolution for you to print wall art.

  1. Can you tell me what excites you about photographing weddings?

When selecting a wedding photographer, you are selecting more than just an individual to take pictures of your wedding day. You’re hiring someone who will be an integral part of the entire celebration, with you, your family, and your group all day on your wedding day.

Personality is an important factor in the selection process and should not be overlooked or discounted in any way.  I always say in order to create beautiful artwork you need to be able to connect and feel completely at ease with your photographer.

  1. May I see wedding albums from a complete wedding?

When selecting a wedding photographer, you should look for an album that best represents you and your new family. Wedding albums come in all shapes and sizes. A few questions you should ask your wedding photographer are: How many pages come in the wedding album? How many images will be in the wedding album? What cover options are available?

What do you plan to do with all the images from your wedding photographer? Most photographers will offer packages that include a wedding album. For those couples who are not considering an album as a part of their package, I always ask what they are planning to leave behind for their kids?  While digital is convenient, leaving a USB/DVD as a family heirloom just doesn’t cut it.

  1. How many hours of photography are included? How much extra hours.

Something often overlooked when selecting a wedding photographer is the number of hours that will be offered for the coverage of your wedding.

Typically, you will want your wedding photographer to be with you to document all of the amazing and quirky moments of your wedding day. After all, thats what you are hiring them for! That being said, typical coverage requirements for your wedding day should be about 8-10 hours to capture the magic from the initial preparations to the party. If you have a small wedding, then maybe hourly coverage is a better option.

  1. How many photographers are included in the package?

How many wedding photographers will be at your event? Most events need at least two wedding photographers. This ensures that your main wedding photographer is focused on working with your wedding party and directing the day, while the “second shooter” has additional coverage going on at the same time, like photographing the guys during the morning preparations, guests arriving to the church, candid shots, etc.

Small weddings can be covered by one photographer too. Large 200+ guests weddings sometimes require even 3 or 4 photographers to cover all events throughout the day.

  1. Is the pre-wedding tester session included?

While most of the photographer offers this option, very often it is just a simple, quick portrait session in the couples/photographers’ chosen location. For your own peace of mind, there is another option available to you.

All of my wedding couples always go for a pre-wedding session at their chosen wedding venue. Couples LOVE this idea. I would walk you through the photography ideas and we would take test images around various venue locations.

This way on your wedding day you know exactly what options are available, and have discussed the plan with your photographer. If the couple has a locale that is particularly special to them, we can visit this location on the same day as your pre-wedding photos at the venue.


Wedding Day Photography Timeline Tips, and F.A.Q.s

Here’s a rough and dirty guide to how much time we need to do the various types of photos that we usually do at your wedding:

  • Getting Ready: At least 30-45 minutes with both the guys and the girls, but the more the better (see the F.A.Q.s below for how to figure out our start time)!
  • Bride + Bridesmaids: 30 minutes (before the ceremony is recommended)
  • Groom + Groomsmen: 30 minutes (before the ceremony is recommended)
  • Wedding Couple Together: 45 minutes-or-so. If you do a “first look,” that usually takes about 10 minutes and we usually recommend scheduling about 15 minutes right before sunset for the best light.
  • Whole Wedding Party: 20-30 minutes
  • Immediate Family: This is based on how many groups you want to do. We usually recommend about 1.5 minutes per small group (2-8 people) and about 5 minutes per large group (8+ people).
  • Extended Family: We usually recommend keeping family formals to immediate family and then doing less “formal” photos with extended family members as you see them during reception. But, if you would like to include extended family in the formals, then use the same timing calculations as for immediate family.
  • Ceremony Prep Time: 15-30 minutes. Don’t schedule any other photo sessions for the 15-30 minutes right before your ceremony so we can get set up, communicate with videographers about how we/they plan to shoot, etc.


How ready should we be when you get here/what should we have ready?

We usually recommend that we start when our brides have their hair close to completed and just before they are starting make-up. We recommend that our grooms be showered (because we are pretty confident that you don’t want photos of that…) and have their pants and undershirt on (no collared shirt, tie or jacket on). You will also want to plan on having any details you want photographed out and readily available (dress, shoes, invitations, garter etc). That way we get to experience and capture all the parts of your day and really tell the full story.

How long should we set aside for sunset photos in our wedding day photography timeline?

This will vary a little depending on your location/how much time we have already spent shooting with the two of you. If we have already gotten around 20-30 minutes of couples photo time then setting aside 10-15 minutes for a few sunset photos in gorgeous light should be perfect.

TIP: Sunset times change everyday and vary depending on where your wedding is located! So, look up the sunset time for your wedding day/location here and schedule a little reception “down-time” (maybe during dinner or near the beginning of open dancing?) during the 15 minutes before sunset so that you don’t have to worry about missing anything important during your sunset photos.

When should we feed you?

Much like with a mogwai, making your photographer wait to eat until after midnight is a bad life decision. Wedding photography is a super active profession and by the time your reception starts we will have trekked several miles with very heavy equipment hanging off of us the whole time. So, we need to eat or else we risk passing out or getting sick from our blood sugar getting too low. A nice hot meal will get us back in action, refreshed and ready to rock the rest of the evening!


Traditional Vs Unusual Shots

There’s nothing more important than a great variety when it comes to composing your wedding photographs. You should know the classical rules but also be able to break them in a meaningful way.

The rule of thirds is one of the most typical rules and while it’s probably over-hyped, it can still help you become mindful of off-centre compositions.

You have to be aware that every setting has its own ‘’default rules’’ and you shouldn’t force your ideas before considering these rules. For example, when you encounter a scene with almost perfect symmetry in the background, a symmetrical composition is something you should start from.

The same goes for asymmetrical backgrounds; instead of trying to fix them, you can align your subjects in a rather unusual way or come up with some avant-garde posing ideas.

Home Electrical Safety Inspection Safety For Kids

Electrical Safety Inspection

An electrical safety inspection of your area home can bring you peace of mind. Knowing that your home’s electrical grid is set up safely and operating properly helps prevent the risk of injury to family members or damage to possession or property.

The licensed electricians at Electrical offer thorough, convenient and cost-effective residential electrical inspections for homeowners. If we locate an electrical problem with the home’s wiring or a specific electrical device being used, we can recommend and quickly make any needed repairs to improve your home safety. Our expert inspectors are friendly and can explain any electrical issues in plain language.

A proper home electrical inspection helps homeowners:

Ensure that your household electrical system is properly installed and operating up to established building and safety codes.

Satisfy homeowner’s insurance company verification requirements so that you qualify for insurance and get fair or reduced insurance rates.

Determine if your home’s electrical system is out-of-date, inadequate for your home’s electrical needs, operating inefficiently or if it’s unsafe.

Prevent a damaging house fire, dangerous electrical shock or inconvenient power outage at your home.

Find out about any electrical problems in a home you are about to purchase, which may provide you negotiating power with the seller to cover needed electrical safety upgrades.

Check the safety and efficiency of the electrical system in a home you have recently purchased.

DIY Electrical Inspections or Repairs Are Dangerous

Only a properly trained, experienced and licensed residential or commercial electrical inspector can provide reliable property inspection. Home electrical safety is no place to cut corners or rely upon an amateur.

Expert Home Electrical Diagnostics

If you suspect an electrical problem in your home, if your lights flicker at odd moments or if circuits break constantly, call on the electrical experts at Electrical. If you can’t run the microwave and the AC at the same time—let Electrical help get your home electrical wiring running smoothly and safely. Are your lights flickering at odd moments, or do you hear strange sounds when you hit the light switch? These electrical problems can only get worse unless repaired.


Whole Home Electrical Safety Inspection

Getting your home’s electrical systems inspected can correct small issues before they become big problems. While you may not think about it, electrical problems cause more property damage and home fires than anything else. Whether it’s a miswired light, damaged outlet, or faulty smoke detector, an electrical issue can mean big problems for your Marietta home

The Benefits of a Whole Home Safety Inspection

Getting a thorough home inspection will give you a clear picture of the health of your electrical system. Your expert technician will provide a detailed list of issues that may need immediate attention, are a recommended improvement, or something you might want to upgrade in the future

Here are three benefits you can receive right away from the inspection.

SAFETY – During an inspection of your home’s electrical system, a professional electrician will check the wires, circuits, connections, breakers, and fuses for issues that could lead to electrocution or fires.

SAVE ENERGY – Damaged or defective wiring uses up a lot of energy, which shows up on your energy bill each month. Correcting these issues discovered during an inspection reduce energy consumption, saving you money. Also, if you’re adding new appliances to your home, this inspection will help you determine whether your electrical system is up to the new demand.

THE ELECTRICAL SYSTEM WILL COMPLY WITH LOCAL STANDARDS – Getting a whole home inspection will get your electrical system up to code and not break any electricity standards. If you’re buying or selling a home, making sure the electrical system is in compliance will bring you peace of mind.

How to Keep Electricity Flowing

Like everything, home wiring doesn’t last forever. When wires get old, they can break or fray, causing a dangerous situation. The key to maintaining the flow of energy through your home is replacing worn or damaged components before a small issue becomes a big, and potentially expensive, problem.


Home Electrical Safety Check

Each year, hundreds of thousands of homes are ravaged by fire – fires that could have been prevented by a comprehensive home inspection. That’s why the Electrical Safety Foundation International recommends that a separate and complete electrical inspection be conducted for any home that is over 40 years old, has had major renovation, major appliances added or is changing owners.

conduct electrical inspections that go further, examining all aspects of your system – and in the process uncovering any hidden dangers. In our comprehensive 100 point safety inspection, Sentry Electric will examine all aspects of your electrical system thoroughly, verifying that every component has been installed correctly and functions safely.

Electric’s “Electrical Safety Inspection” includes:

Inspect switches and outlets for signs of overheating, damage, abuse and loose terminations.

Inspect and verify GFCI protection in all required areas inside are installed.

Inspect and verify proper grounding and bonding of main electrical service.

Inspect entire main electrical service for proper terminations and safety.

An infrared scan of your circuit breaker panel to discover hidden problems.

Inspect all outdoor electrical for “rain proofing” and circuit protection.

Verify all junction boxes are properly installed.

Inspect any sub-panels present for proper terminations and safety.

Verify that smoke detectors are of the proper type and installed in required areas.

Verify that “surge protection” is installed for whole house protection.

If aluminum wiring is present, verify that proper termination methods were used.

Verify proper grounding of switches, outlets and lighting fixtures.

Verify ceiling fan braces and supports are present where ceiling fans are installed.

Verify wiring to any detached structure is installed properly and safe.

Verify main breaker panel is properly labeled.

Verify all branch circuit breakers are sized properly.

Verify required circuits have lock-outs or disconnects installed and accessible.

Verify existing circuits are distributed properly for required load.

Insure that our customer is fully aware of the items that need attention and exactly what the price will be to complete the work before we start.


Electrical Inspection

which is why we highly recommend a regular National Electric Code (NEC) and safety electrical inspection for your whole home. Loose connections, poorly installed switches, aging outlets, absent GFCI plugs, and overloaded circuits are just a few of the things a full inspection might find.

Even if your home was up to code when it was built, the NEC updates over time for changes in technology and new information. Your home also ages over time, leading to degraded outlets, wiring, and connections. Everything wears out eventually. As good as regular maintenance and immediate repairs are, nothing lasts forever.

From the transmission line interconnect to the last outlet in your home, nothing goes unnoticed. electricians will do all of the following:

Inspect the wall wiring for damages or signs of overheating, which could lead to insulation fires

Test your electrical panel to make sure it’s not being overloaded and that none of the breaker switches are worn out

Test every GFCI and AFCI circuit in your home

Check of your smoke alarms to make sure they’re still in good working order

highly trained electricians recommend a full inspection for circumstances such as:

A newly constructed home

A newly purchased home

Preparing home for sale

Renovations

10 years or more since your last inspection

know it can seem counter-intuitive to inspect a home that’s just finished construction, but getting a full inspection can help you identify problems that were missed or items that were accidentally left out during initial construction. Similarly, inspecting your home before you buy a new one is always advisable and sometimes required. Not only are you aware of what needs to be fixed but you might be able to get those repairs added as part of the purchase contract.


What’s Involved in an Electrical Inspection?

As the weather starts getting colder, homeowners make more calls for electrical inspections. Often this is because an electrical problem has arisen, such as overloaded electrical circuits, commonly caused by the increased use in the number of appliances. Many people are under the false impression that electrical inspections and tests are costly, in terms of both time and money. However, the majority of electrical inspections are little hassle, and ends up leaving the customer with peace of mind, and confidence that their property is electrically safe. Electrical inspections may reveal potential problems. However, these can normally be easily rectified, as it has been brought to attention before it has become a greater and thus more expensive issue.

What is an electrical inspection?

Electrical inspections are based on the electrical system of each individual household. With prolonged age and use, all electrical appliances deteriorate. Therefore, it is important that they are inspected and tested regularly, in order to check they are in a suitable condition for further use. These safety tests are often referred to as Periodic Inspection and testing.

A periodic electrical inspection will:

Find if there are any potential electric shock risks and/or fire hazards.

Reveal if any electrical circuits or equipment are overloaded.

Identify defective electrical work.

Highlight any lack of earthing or bonding.

Electrical inspections should be performed by qualified persons only. They will check the condition of the electrics against the standard for the safety of electrical installations. The electrical inspection will check on the: adequacy, suitability and serviceability of your electrical appliances. For example, it will check the switches, sockets and light fittings; check for any damages and make sure there are adequate signs and notices.

Career Option Commercial Electrical Maintenance

Ways a commercial electrician can help your business succeed

Your business’s electrical system is essential for your daily operations. Without safe, reliable access to electricity, you would have constant business interruptions and possibly be in breach of work health and safety standards. As such, a commercial electrician can be a valuable partner and guide for your business, but what are the specific ways they can assist? Here, we take a look at some of the most important ways commercial electricians can support your business and its priorities.

TESTING AND TAGGING APPLIANCES

Testing and tagging appliances involves checking your business’s portable electrical appliances and ensuring they’re safe to operate. A commercial electrician will perform a visual check for damage before using specialist appliance equipment to test each appliance. They will then affix a tag on the appliance to mark it as tested and safe. The tag should specify a recommended next-test date.

CIRCUIT BREAKER TESTING

A commercial electrician can carry out circuit breaker testing, which is designed to test your switching system and how your tripping structure is programmed as a whole. It’s a vital type of test to support the safe, reliable performance of your circuit breakers. Your business premises’ circuit breakers are responsible for conducting electricity currents and insulating contacts from one another. They also disconnect the fault current quickly when there’s a fault, to protect your equipment.

ENERGY EFFICIENCY

A reputable commercial electrician can identify ways to raise the energy efficiency of your business. Boosting energy efficiency and sustainability could, in turn, enhance your business performance, ROI, minimise earnings volatility, and improve overall profitability. Consumers often value companies with sustainable practices, so becoming more energy efficient can improve your brand reputation as well.

LIGHTNING PROTECTION

Lightning protection is widely used in buildings and commercial sites around the world. These systems divert the lightning current away from your commercial site to reduce the risk of injury and damage. While the likelihood of lightning striking your building might seem remote, the damage to equipment can be significant. Lightning protection can also prevent lightning-related fire and structural damage.


EMPLOYEES AND ELECTRICAL MAINTENANCE

Except when the supervision is provided by a power limited technician, which limits the maintenance work to technology circuits and systems, examples of work allowed within the scope of a maintenance electrician include:

Replacement of receptacle outlets of any voltage, phase, system, or amperage with devices having identical characteristics

Replacement of manual lighting switches of any voltage with devices having identical characteristics

Replacement of motors of any voltage, phase, system, or horsepower, as a singular unit, or as part of a machine or apparatus, with a motor having the same characteristics

Repair of manual, magnetic, or electronic motor controllers using replacement parts, including sub-assemblies, that are identified as factory replacement parts for the specific assembly

Repair or replacement of defective circuit breakers and switch assemblies in switchboards and panelboards with factory parts or replacements that are identified by the manufacturer as suitable

Repair or replacement of defective bus duct switches using factory replacement parts or identical replacement assemblies

Repair of defective lighting fixtures using approved replacement parts

Bench repair of electrical equipment

Examples of work not allowed within the scope of a maintenance electrician include:

Extension of any electrical wiring, including technology circuit and system wiring, whether existing or new

Installation of wiring for, or connection of, new equipment or apparatus

Installation of replacement or new conductors in existing raceways

Replacement of damaged wiring methods (raceways, cables, flexible connections, etc.)

Replacement of existing lighting fixtures with new or repaired units

Installation of temporary wiring of any type or for any purpose

Replacement of any component or subassembly with an item that is not identical to that being replaced

Modification of lighting fixtures as part of a lighting retrofit project

Building automation systems, including power limited systems

Electrical work not within the scope of “maintenance work” may be performed by an unlicensed, registered maintenance person where the responsible individual is licensed as a Class A Master Electrician and the maintenance person is provided with direct supervision by a person licensed as either a Class A Master or Class A Journeyworker electrician and both are employees of the same employer.

Electrical maintenance work and minor repair work are exempt from mandatory inspection in accordance with Statutes section 326B.36 Subd. 1. All other electrical work, unless specifically exempt under Statutes section 326B.36 Subd. 5 is subject to inspection. An active Request for Electrical Inspection must be on file whenever electrical wiring that is required to be inspected is being performed. All electrical wiring must be inspected prior to being concealed in any manner, including by burial, insulation, encapsulation, or concealment by floor, wall or ceiling covering or sheathing.


Expert Commercial Electrical Contractor

electrical professionals and can assist you with a variety of electrical installations, maintenance, and repair work specific to commercial and industrial operations, including:

Fire and smoke alarm installation and repair

Electrical design build

Energy-efficient lighting

Electrical maintenance

New electrical installs

Electrical inspections

Motor controls

Teledata/VoIP solutions

reliable team of industrial electrical contractors understands the special considerations and unique concerns of a commercial building’s electrical systems, and has the experience and skill it takes to perform excellent maintenance and repair on your facility’s electrical issues so you can keep your company running smoothly and efficiently.

Commercial Electricians You Can Trust

As a business owner, you have a lot on your plate. Your commercial building’s electrical concerns may be one of the farthest things from your mind. We make it easy to ensure your industrial or commercial building stays up to code with the latest electrical safety measures in place.

Not only that, but we can help improve your bottom line with money-saving electrical solutions for your structure. If you have a new commercial building under construction, let us help with the electrical design build and install. Moving to an existing industrial facility? We can handle the electrical inspection, make sure your fire alarm system is functioning properly, and recommend new installs, maintenance, or repair solutions for any red flags we see.

highly skilled electricians can assist with just about any commercial or industrial electrical problem you are experiencing. Our years of experience and knowledge in the commercial electrical arena help us quickly assess the situation, recommend effective solutions, and perform quality maintenance or repair to address the issue. We’re a family owned company that prides itself on outstanding customer service, and we always treat each client with the utmost courtesy and respect


Electricians

What Electricians Do

Electricians install, maintain, and repair electrical power, communications, lighting, and control systems.

Work Environment

Almost all electricians work full time. Work schedules may include evenings and weekends. Overtime is common.

How to Become an Electrician

Most electricians learn through an apprenticeship, but some start out by attending a technical school. Most states require electricians to be licensed.

Pay

The median annual wage for electricians was $56,180 in May 2019.

Job Outlook

Employment of electricians is projected to grow 8 percent from 2019 to 2029, much faster than the average for all occupations. Homes and businesses continue to require wiring, and electricians will be needed to install the necessary components.

State & Area Data

Explore resources for employment and wages by state and area for electricians.

Similar Occupations

Compare the job duties, education, job growth, and pay of electricians with similar occupations.


Commercial Electrician Job Description

While the number of jobs in the electrical trade is projected to grow by 14 percent in the ten-year period leading up to 2024, commercial electricians in particular may discover their prospects are even better since new commercial development and civil projects are outpacing even residential building

Licensing classifications aside, you can always identify a commercial electrician by their work setting and the type of jobs they’re on. In simplest terms, commercial electricians install, upgrade, maintain, troubleshoot, and fix electrical systems in virtually all non-residential settings, including:

Banks

Government agencies

Schools

Businesses and retail establishments

Offices

Airports

Recreation facilities

Restaurants

Commercial construction sites

The Roles and Job Duties of Commercial Electricians

Commercial electricians perform a wide range of duties, which can change according to their work setting and the kind of job they’re on. Generally speaking, the electrical needs of most commercial settings typically require:

Installation of commercial switch gear

Termination of large conductors

Installation of cable trays

Installation of commercial outlet boxes

Installation of bus ducts

Commercial wiring and lighting

Electrical work on commercial transformers and generators

Electrical work on raceways

System wiring that involves significantly more electricity than residential sites

Commercial electricians are generally considered different from industrial electricians in that commercial wiring work doesn’t typically involve working with high voltage systems, industrial machinery, or at industrial settings like factories, refineries, foundries, oil and gas fields or power plants.

In one job vacancy announcement from July 2016 looking for a commercial electrician to serve as the on-site electrical technician, the following job description was provided:

Repair, install, and maintain electrical systems that include motors, transformers, internal/exterior conduit, generators, switchboards, and power circuits

Replace circuits, fluorescent tubes, ballasts, fuses, switches, and receptacles

Use schematics to troubleshoot fuses, circuits, switches, fixtures, and ballasts

Perform preventative maintenance and repairs

Is Your Tap Water Testing Causing Toxic Water Infirmities

Water Softener Buying Guide

Hard water can cause many problems around your home, from spots on glassware and a film on shower doors to plumbing problems and inefficient operation of water-using appliances. Installing a water softener can help. Learn more about water softeners to get the best one for your home.

Introduction to Hard Water and Water Softeners

A water softener removes the calcium and magnesium ions that make water hard by replacing them with salt/sodium via ion exchange. Look for a National Sanitation Foundation (NSF)-certified water softener with a system monitor. This will indicate when salt is low and ensure you maintain optimum levels for soft water

What does the grain capacity of a water softener mean?

The rated capacity of a softener is the maximum number of grains of water hardness the unit can remove prior to regeneration.

How is the hardness of water measured?

The hardness of water is measured in grains per gallon (gpg). One grain of hardness is equal to 1/7,000 pound of rock. Your municipal water supply may measure water hardness in milligrams (mg), liters (L) or parts per million (ppm). One gpg is equal to 17.1 mg/L or 17.1 ppm.

How do I determine my water hardness?

You can call your municipality if you use city water, or purchase a water test kit.

How do these numbers impact my water softener purchase?

To determine the appropriate water softener size for your home, multiply the number of people in your home by the gallons of water they use each day (80 gallons per person is the average). Multiply that number by the grains of hardness in your water to figure out how many grains need to be removed each day. Then, shop for a water softener equipped to handle the load. Most four-person households use a 33,000-grain unit.

What is regeneration?

Over time, the resin bed inside the water softener becomes coated with hardness particles. When this happens, the softener goes into its regeneration cycle. During regeneration, the salt in the tank is mixed with incoming water to rid the resin bed of these hardness particles. After regeneration, the unit is ready to provide a steady stream of soft water to your home again.

What type of salt should I use?

A clean pellet or nugget-style salt is recommended. Other types of salt are available for specialized applications.

Does the recharge water from the softener harm my septic system?

No, water softener recharge water won’t affect septic system operation or drain field soil percolation.

How much water does each recharge use?

It uses about as much water as it takes to wash a load of laundry.

How much electricity does a water softener use?

It uses about as much as a digital alarm clock.


Copper in drinking water

Copper is a metal that exists in the environment as a mineral in rocks and soil. It is commonly found at low levels in natural water bodies. It is also an essential trace element that is required to maintain good health.

Copper pipes are used extensively in plumbing systems throughout Western and in many countries of the world.  However, where copper pipes corrode they can release copper into your drinking water to a level that can affect its quality and safety. The information contained in this guide will help you identify signs of copper corrosion and provide advice on how to minimise its effect on your health.

How does copper get into drinking water?

Low levels of copper can be found naturally in all water sources. However drinking water that has been left standing in household copper pipes for long periods of time is usually the main cause of higher levels of copper.

What are the potential health effects of copper?

The normal adult requires approximately two to three milligrams of copper per person per day. More than 90% of your dietary need for copper is provided by food. Drinking water usually provides less than 10% of your daily copper intake.

Is drinking water tested for copper?

In Western all mains water supplies are continually monitored by the Department of Health to ensure copper levels do not exceed Drinking Water Guidelines.These guidelines set two levels for copper:

1mg/L for aesthetics to prevent taste and staining problems

2mg/L to prevent any health related problems


A Guide to Brewing Water Treatment

Brewing Water Profiles

Water is a deceptively understated and underrated force in the making of any beer. Hugely variable throughout the world, it is abundant with minerals and organic compounds that have the ability to elevate an ordinary recipe to the status of a world classic, or drown it in the shallows of mediocrity. Luckily for brewers, water is also a flexible substance that can be made to order to brew beers of any style — provided it is treated right


Soil Quality Test Kit

The Soil Quality Test Kit Guide describes procedures for 12 on-farm tests, an interpretive section for each test, data recording sheets, and a section on how to build your own kit. The NRCS does not build or sell soil quality test kits.

For an abbreviated and economical build-your-own Soil Quality Test Bucket and associated Soil Quality Kit – Guides for Educators, visit Soil Quality for Educators.

Section I contains step-by-step instructions for running each of the tests included in the Soil Quality Test Kit. It is fully illustrated with photos to show the procedures and equipment needed to complete each step. Appendix D includes instructions for building a test kit.


FAQs: Water for Pharmaceutical and Analytical Purposes

  1. Why are there no microbial requirements included in the monographs for Purified Water and Water for Injection?

Because of the various uses of these waters, microbial requirements are not included in these monographs since this would unnecessarily burden some users with meaningless and/or inconsequential or inappropriate requirements, e.g. water used for many laboratory analyses. Microbial guidelines are provided under the informational chapter Water for Pharmaceutical Purposes where it states that the user should establish in-house specifications or fitness for use microbial levels above which the water is unsuitable for use.

  1. What is the purpose of microbial Alert and Action Levels for Purified Water and Water for Injection?

Alert and Action Levels are process control terms and should be established at levels indicative of the water system trending outside of its normal microbial control range. These levels should be established at levels no higher than, and preferably lower than, those listed in Water for Pharmaceutical Purposes based on the normal microbial performance trends in your water system. The purpose of Alert and Action Levels is to trigger additional, non-routine, rather than routine microbial control measures. These additional control measures should prevent objectionable levels and types of microorganisms from being present in the water, based on for the water’s use.

  1. For off-line testing of water samples for Water Conductivity and Total Organic Carbon , how long can I store samples before testing?

USP is silent on a specific answer to this question. It is understood that some manufacturers have their analyses performed by external laboratories – which may take several days or longer. For this reason, there is no time limit.

In general, you can wait as long as you want – at your risk. But it is advised to test as soon as practical for the following reasons; 1) when stored, the water purity only degrades over time. Since Purified Water, Water for Injection or the sterile waters are of such high purity, the passage of time does not do anything except potentially degrade the sample due to environmental, ambient, or container factors; and 2) water is typically not produced in batches, but rather it is usually purified, produced, and consumed continuously. The water may have had direct product impact or contact before any lab analysis is executed. Delays in testing only increase the amount of potential product impact – in the event of a failed test.

  1. For off-line testing of water samples for General Chapters Water Conductivity and Total Organic Carbon , how should I store the samples?

For lab analyses, samples should be stored in containers that do not adversely impact the test results. This is to prevent false positives and unnecessary investigations. For example, storage of water in a glass container for a few hours is usually good, but storage for a longer time will result in a modest increase in the sample conductivity. This is due to the leaching of sodium silicate from the glass, raising the pH and the water conductivity, and threatening to fail Water Conductivity. In general, clean plastic containers are a better choice for long term storage of samples for Water Conductivity testing. For Total Organic Carbon, there is a similar rationale – many types of non-shedding plastics or glass suffice. In general, storage at ambient or refrigerated temperatures is best for these chemical tests, while refrigerated storage is advised for samples used in microbial testing. Cleanliness of any container is most critical. Due to the very high purity of these waters, fingerprints, soaps, and other residues must be avoided. False positives can result.

  1. Can I do Water Conductivity and Total Organic Carbon testing on-line?

These two chapters specifically state that these tests can be performed off-line or on-line. There are benefits and challenges for each approach, and they are described in more detail in these chapters and in Water for Pharmaceutical Purposes. In general, on-line testing avoids the risk of contamination of off-line samples by humans, containers, or the environment, and it provides immediate analysis and direct opportunities for real-time control, decision and intervention. For example, you can continuously test and accept the water (for these chemical attributes). Conversely, you can prevent the distribution of the water in the event of a failed test in real time. However, for a facility with multiple types of waters and loops, a centralized lab analysis system may offer a more economical choice. In either case, the water sample must be representative of the water used in production.

Ways To Manage Your Tax Planning

The Need for Tax Planning

What Is Tax Planning?

Tax planning is the practice of using effective strategies to delay or avoid taxes. When you sit down and make a tax plan with your tax planning advisor, you look at ways to defer or avoid taxes by taking advantage of provisions in the tax law that benefit taxpayers. You find ways to accumulate and speed up tax credits and tax deductions. Tax planning means taking advantage of every tax break available to you under the federal tax code.

Tax planning goes hand-in-hand with financial planning, which means making a plan to achieve your short- and long-term financial goals. It is hard to effectively financially plan for your current situation or your future without employing tax planning strategies to meet those goals.

If you enjoy financial success, taxes will be a large expense. Cutting down on those taxes or even eliminating them when possible is an important element of preserving your wealth.

The main purpose of tax planning is to make sure you approach taxes efficiently. Tax planning reduces your tax liability by employing effective strategies that explore ways that not only decrease taxes but secure a more solid future and retirement. It does not matter whether you make $50,000 a year or $500,000 a year. When you take the time to make a tax plan, you will find numerous ways to save money.


General areas of tax planning

There are several general areas of tax planning that apply to all sorts of small businesses. These areas include the choice of accounting and inventory-valuation methods, the timing of equipment purchases, the spreading of business income among family members, and the selection of tax-favored benefit plans and investments. There are also some areas of tax planning that are specific to certain business forms—i.e., sole proprietorships, partnerships, C corporations, and S corporations. Some of the general tax planning strategies are described below:

Accounting Methods

Accounting methods refer to the basic rules and guidelines under which businesses keep their financial records and prepare their financial reports. There are two main accounting methods used for record-keeping: the cash basis and the accrual basis. Small business owners must decide which method to use depending on the legal form of the business, its sales volume, whether it extends credit to customers, and the tax requirements set forth by the Internal Revenue Service (IRS). The choice of accounting method is an issue in tax planning, as it can affect the amount of taxes owed by a small business in a given year.

Accounting records prepared using the cash basis recognize income and expenses according to real-time cash flow. Income is recorded upon receipt of funds, rather than based upon when it is actually earned, and expenses are recorded as they are paid, rather than as they are actually incurred. Under this accounting method, therefore, it is possible to defer taxable income by delaying billing so that payment is not received in the current year. Likewise, it is possible to accelerate expenses by paying them as soon as the bills are received, in advance of the due date. The cash method is simpler than the accrual method, it provides a more accurate picture of cash flow, and income is not subject to taxation until the money is actually received.

In contrast, the accrual basis makes a greater effort to recognize income and expenses in the period to which they apply, regardless of whether or not money has changed hands. Under this system, revenue is recorded when it is earned, rather than when payment is received, and expenses recorded when they are incurred, rather than when payment is made. The main advantage of the accrual method is that it provides a more accurate picture of how a business is performing over the long-term than the cash method. The main disadvantages are that it is more complex than the cash basis, and that income taxes may be owed on revenue before payment is actually received. However, the accrual basis may yield favorable tax results for companies that have few receivables and large current liabilities.

Under generally accepted accounting principles (GAAP), the accrual basis of accounting is required for all businesses that handle inventory, from small retailers to large manufacturers. It is also required for corporations and partnerships that have gross sales over $5 million per year, though there are exceptions for farming businesses and qualified personal service corporations—such as doctors, lawyers, accountants, and consultants. Other businesses generally can decide which accounting method to use based on the relative tax savings it provides.


Why Should I Tax Plan?

The main reason to tax plan is to ultimately have more money that you can either invest in new projects, save or even spend. Or do all three. The choice is yours.

There are more good reasons for tax planning.

  1. Strategic Tax Planning and Tax Management Can Lower Your Taxes

In the end, tax planning is all about reducing your tax bill. Keep in mind that tax planning:

  • Is especially important if you own a business or if you are self-employed
  • Makes sense if your investments have hefty unrealized losses or gains
  • Is useful when you experience a major event in your life, such as getting married or divorced, having a baby, buying a home or retiring
  • Is helpful if you move to a new job or sustain a significant change in your income, either up or down
  • Can help you save money if you are sending one of your children to college for the first time
  1. Tax Planning Gives You Time to Strategize and Get the Most Out of Your Benefits

Too often, people wait until the very last second to try to use a tax benefit. While this works on occasion, effective tax planning requires that you allow for time to study the situation and make the appropriate decisions. Smart tax planning happens all year long, not on the last day of the year or the day before your taxes are due.

  1. Tax Planning Lets You Take Advantage of Changes the IRS Makes

Tax laws are always a little different every year. Very often, there are only minor changes, but after 2017, tax laws looked significantly different. Tax planning allows you to ready for these changes, whether minor or major, and make decisions about how you wish to deal with them and how they will affect your taxes.

  1. Tax Planning Helps You Avoid Deadline Dread

Regardless of changes the government makes to tax laws, decisions about how you want to deal with these changes and with your taxes every year have a firm deadline of midnight on April 15. Tax planning at the appropriate time means you are well prepared to deal with any contingency and in no danger of suffering deadline dread. A tax planning consultant ensures you are ready.


Types of Tax Planning

There are a few different types of tax planning that are useful for individual people, companies and organisations. Some of the tax plans include; short term tax plans, long term tax plans, permissive tax plans and purposive tax plans. The short term planning allows you to reduce taxes at the end of the income year. Long term plans allow you to plan at the end of the beginning or end of the year, permissive tax plans are permissible under different law provisions. The purposive tax plan gives you the chance to make different investments.

How It Works

When you start tax planning, you can find many guides online and you can also speak to financial advisors and solicitors to help get you started and give you all the important information that you will need to know. For example, each person has an inheritance tax allowance up to £325,000 with anything over the threshold being charged at 40%. So, if an estate was valued at £400,000, only £75,000 of that would be taxed. Since the majority of people won’t leave an estate over this amount, most feel they don’t need to know about inheritance tax. However, actively considering it and your future can help you to avoid any nasty surprises later on.


What Are Strategic Income Tax Planning Strategies for Individuals?

When you work with a tax or wealth advisor, you can develop strategies to reduce your tax bill, save money and plan for your future. Here are several tax strategies you might want to consider that reflect the importance of taxes for personal finance planning.

  1. Make the Most of Tax-Efficient Accounts

In most cases, this means taking advantage of retirement savings plans. Depending on which type of plan you choose, you can reduce your current tax bill or your future tax bill.

Whether you choose a traditional IRA, 401(k), a Roth IRA, or a Roth 401(k) they are all subject to limits on how much you can contribute. The amount is quite different between all four, and so it is smart to talk to a tax consultant about what might be the best plan for you.

Traditional 401(k)s and IRAs are the best idea when you want to defer taxes until later. Roth 401(k)s and IRAs are the best choices when you want an investment that offers you tax-free potential growth.

  1. Mix And Match Your Accounts

When you split your contributions among various types of accounts, whether they are retirement savings plans or brokerage accounts, you give yourself space to determine what your future taxes will be and how to deal with them. This is only possible if you take the time now to create different accounts that allow you to diversify your taxes.

  1. Reduce Your Taxable Income

Reducing your income does not mean you want to make less money every year. It does mean you take a look at strategies that could decrease your Adjusted Gross Income (AGI) by using effective tax strategies. This includes:

Putting contributions into retirement savings plans

Making donations to charity

Using investment losses to reduce your income

  1. Implement Personal Income Tax Planning Strategies for Investors

Everyone wants to invest wisely, of course, but there are specific investments that provide generous tax benefits. For instance, you do not pay federal taxes on municipal bonds, and that is often true of state and local taxes as well. Managers of taxed-manage mutual funds work hard to ensure they are tax efficient. There are many other types of similar investments you can make, so it is important to talk to your tax advisor to understand what the tax benefits may be connected to different kinds of investments.

  1. Connect Your Investments With the Right Type of Account

It does not make much sense to have tax-efficient investments if you are not putting them in the right place. You want to make sure your investments work with accounts that offer the best tax treatment. For instance, if you have investments like taxable bonds or stock funds that generate income, it is smarter to hold them in a tax-deferred account like a traditional IRA. This will give you the greatest potential benefits.

  1. Hold Onto Your Investments to Avoid Higher Capital Gains Taxes

Normally, it does not make sense to keep a stock that you want to sell only because you want to avoid taxes. Sometimes, however, you do want to hold off on selling an investment. For instance, if you sell stocks that you held for less than a year, they will be taxed at your ordinary income rate.

If you wait longer than a year to sell stocks, they are taxed with a long-term capital gains rate. In many cases, a long-term capital gain rate will be significantly less than your regular income tax rate. Before you decide to sell a stock, check with your tax advisor about tax implications.

  1. Employ Your Losses to Offset Your Gains

If you have any investment losses, use them to offset your gains on investments. Tax gain-loss harvesting can minimize your tax liability. If you lose more on your investments than you gain, you can then use those losses to offset as much as $3,000 of earned income in a single year. So if you make $50,000 a year, but you lost $3,000 in investments, your taxable income would only be $47,000. You can also carry additional losses forward.

Give Yourself A Break From Housework With Professional Residential Cleaning Services

The Ultimate Guide to Residential Cleaning Services

When selecting a professional to conduct cleaning services on your residential property, it is important to ensure they hit the minimum health and safety requirements listed below:

IRATA certified for rope access

Advanced Rigging

EWP Licence (elevated work platform)

licence to perform High Risk Work

Working at Heights

White Card

Working with children’s check

Police checked

20 million public liability

Water Fed Pole

Certificate of compliance


How to Make an Efficient Weekly House Cleaning Schedule Template & Checklist Chart

A few weeks ago, I had some friends over for lunch. I hadn’t cleaned my house in weeks so before they arrived, I had to go into mad dash cleaning mode. For about three hours my husband and I were running around like chickens with our heads cut off dusting everything in sight. Our friends wouldn’t have judged us on the cleanliness of our home (they may not even have noticed), but you don’t want guests to have to experience – or witness – your messiness.

Why Make a Cleaning Schedule?

No More Frantic Cleaning – Your house will be reasonably clean all the time if you stick to your cleaning schedule.

Share Responsibilities – I usually end up doing all the cleaning in my house simply because I know what has been done and what needs to be done. If there is a posted schedule, people can be assigned tasks or pick up tasks that haven’t been done yet.

Less Stress – When my house isn’t clean, I always feel as though I have something I should be doing, which makes it hard to relax. If I follow a schedule, I can relax once I have done everything on my checklist for the day.

Greater Efficiency – If you don’t have your tasks planned out, time is wasted figuring out what to do. With a schedule, everything is mapped out for you to get started. Not only that, your schedule can be tailored to your family members’ strengths and availability.

Fight Procrastination – I procrastinate cleaning for a variety of reasons, but being organized and having a cleaning schedule is one way for me to stop and overcome procrastination.

Steps to a Cleaning Schedule

  1. Determine the length of your schedule

Before you begin to list out your tasks, you need to determine the length of your schedule. Will it be a weekly, biweekly, or monthly schedule? I suggest making a 4-week schedule because that way you are able to include tasks that you do daily as well as monthly tasks, such as checking your smoke detectors to protect your home in case of a house fire.

  1. List your tasks

Make a list of everything that you can possibly think of that needs cleaning. Use my document as a starting point. Your list will probably vary from mine since we all have different homes and different needs.

  1. Determine frequency of tasks

To determine the frequency that you need to do a certain task, think about what makes sense and what is reasonable for you. If you have a guest room that no one ever uses, perhaps you just need to dust it once a month. If you have 2 dogs that shed a lot, like I do, you probably need to vacuum more than the average household. You may have some tasks that you only need to do once a year or a few times a year. For those tasks, assign them as fall or spring cleaning. Then spend a day in the fall and a day in the spring knocking out these tasks.

  1. Assign specific tasks to specific days

If there is a day of the week that is particularly busy for you, don’t schedule any tasks on that day. And if you want to have a couple days off each week, that is OK (and probably good for your sanity). Do what makes the most sense to you. For example, I go to the grocery store on Tuesdays because that is when their truck comes so I know that everything has been restocked.

  1. Assign people to tasks

Assign tasks to the most qualified person. I cook, and my husband mows the lawn. I don’t think we would want that any other way!

  1. Put it in writing

You can document your schedule however you like. You are welcome to modify my document for your own cleaning schedule. I like using an electronic template so that I can save time by just printing it out, rather than hand writing each month’s schedule.

  1. Stick to it

Easier said than done, right? This is definitely the most difficult step. As a motivator, put a dollar in a jar each day you do not finish your tasks, otherwise known as the “Swear Jar Mentality.” This money can then be used as savings!

How to Use My House Cleaning Schedule Template

Using my document to make your own cleaning schedule is simple. After you download and open the Excel file (click on the download link above), you will notice that there are two tabs. The first tab, “Checklist,” is a matrix of chores and dates. It is a 4-week schedule, and you can enter the date of the first day of your schedule in the yellow cell at the top. Inside the matrix, a slash represents the day the chore is to be done. After you have listed your chores and owner and have made the schedule, print it out. When a task is completed, use an opposing slash to make an X to indicate that it is done.


Maids and Housekeeping Cleaners

What Would I Do?

Maids and Housekeeping Cleaners do light cleaning tasks in homes and commercial companies. Those who work in private homes keep these places clean and neat. Additionally, they may polish silver, clean ovens, refrigerators, and sometimes windows. Some also shop for groceries, pick up and drop off dry cleaning, and do other errands.

Some Housekeeping Cleaners work in hospitals, nursing homes, and clinics. They clean such areas as patients’ rooms, bathrooms, hallways, and emergency rooms. These Cleaners disinfect and sanitize equipment. They may need to clean blood and other body fluids. Housekeeping Cleaners must also dispose of waste material

Those who work in hotels and other commercial establishments are responsible for cleaning and maintaining the premises. Common duties include changing bed and bath linens, cleaning bathrooms, vacuuming, and cleaning floors. Housekeeping Cleaners in hotels may deliver ironing boards, cribs, and rollaway beds to guests’ rooms. They may also share other duties.

Maids and Housekeeping Cleaners typically complete the following activities:

Clean rooms, hallways, and other living or work areas.

Change sheets and towels and make beds.

Wash, fold, and iron clothes.

Empty wastebaskets and take trash to disposal areas.

Replenish supplies, such as soap and toilet paper.

Dust and polish furniture and equipment.

Sweep, wax, or polish floors using brooms, mops, or other floor-cleaning equipment.

Vacuum rugs, carpets, and upholstered furniture.

Clean or polish windows, walls, and woodwork.

Lift and move light- and medium-weight objects and equipment.

TOOLS AND TECHNOLOGY

Maids and Housekeeping Cleaners typically use vacuums, cleaning solvents, carpet cleaning equipment, and floor polishers. They also use cleaning brushes, scrapers, and dusters. They may operate laundry type washing machines, clothes dryers, and clothes ironing equipment. Several may use ladders and wheeled carts. Some run data entry, facilities management, and inventory management software.


The coronavirus is giving spring cleaning fresh urgency

Spring cleaning has taken on a new urgency this year. Heeding the Covid-19 prevention guidance from the US Centers for Disease Control and Prevention and other health authorities, people are intensely washing, dusting, and disinfecting homes and offices, with the knowledge that lives may literally depend on it.

Though the novel coronavirus is known to spread mostly through respiratory droplets (like mucus or saliva) from person to person, there’s evidence that transmission can also happen by touching infected surfaces. These include door knobs, handles, light switches, remote controls, and even iPhone screens. A new study suggests that the virus thrives on plastic or steel surfaces for days. The CDC recommends a two-step preventive measure: “cleaning of visibly dirty surfaces followed by disinfection.”

Some are taking extra precautions. Professional cleaning companies are now being deluged with requests for deep cleaning, a process that involves diving into forgotten nooks and crannies to snare dust, dirt and virus-carrying particulate.

Compared to the casual dust-up, a deep clean is an obsessive’s agenda. It means hunting for dust mites behind furniture and cabinets, addressing scum from shower heads and faucets, scrubbing inside ovens, mopping floors under rugs, and sweeping along base boards, ceilings, and window frames. It requires emptying out cupboards to clean the surfaces within.

the pandemic has dramatically impacted their business. More clients are calling for the deep clean service or have increased the regularity of their service. On the other hand, some clients have suspended cleaning schedules for fear of letting anyone in their homes who may have come in contact with someone infected with Covid-19.


How to Clean a New Home

Moving into a new home is akin to making a fresh start. Before heavy furniture or other objects are in place and the items of everyday living are unpacked, give your new abode a thorough cleaning.

Here’s how to clean your new house to help you start off with a clean slate:

Be Systematic: The house cleaners use a methodical approach as they clean room by room. Start at the entryway and move around clockwise. Clean left to right and top to bottom, so that dust and other debris that falls to the floor can be swept or vacuumed at the end of the clean-up.

See the Light: Dust or wipe down light fixtures and shades that are not washable. Glass or plastic light globes should be washed in the sink or bathtub using warm water and soap. Clean the tops of ceiling fans using a damp cloth or vacuum attachment.

Wall-to -Wall: If the previous owners haven’t repainted recently and you don’t plan to, clean the painted or paneled walls now. Test a small area to be sure you won’t damage paint or texture on your walls. First remove dust and cobwebs, then use a soft cloth with mild soap and warm water or a water/vinegar mixture to wipe down the walls. Vinegar is an effective, environmentally-safe cleaner that eliminates most molds, germs, and smells. Pay special attention to baseboards and moldings, tops of door frames, light switches, and heating vents.

Kitchen Cleaning: Pull out your appliances and thoroughly clean behind and beneath them. Use hot, soapy water – or a baking soda and water mixture – to clean your stove top. Baking soda is a mild abrasive that helps remove stains but won’t scratch surfaces. Remove oven racks and clean with soapy water. Turn on the oven’s self-cleaning function. Remove and wash refrigerator shelves and drawers, and clean inside with hot, soapy water (or a water/vinegar mixture). Wipe down cabinets, shelving and counters, but avoid using vinegar on marble. To get rid of sink odors and prevent clogging, pour ¼ cup of baking soda down the drain and follow with one cup of white vinegar.

Bathroom Basics: Clean hard-to-reach places such as under the sink, inside the medicine cabinet and behind the toilet. Clean tiles, tub and sink with a paste made of baking soda and vinegar that also dissolves soap scum. Wipe down glass shower doors with a vinegar/water mixture.

Floor and Carpet Cleaning: Spot-clean carpets or consider hiring a professional steam cleaner to remove pet hair, odors and stains. Sweep floors, cleaning under heating vents. Most surfaces can be washed with a mild soap and water, but make sure to follow manufacturer’s directions for your type of flooring

Standard And Cosmetic Dentist Practices

Finding a New Dentist

When you move into a new home, the first places you probably want to get acquainted with are your kids’ new school, daycare, the family doctor, grocery store, gym, and restaurants. Finding a new dentist might not be very high on your list, but it should be. Finding the right dentist for you and your family when you are new to the area can take some time, but it’s time well spent.  The sooner you start, the better.

What You Should Look for in a New Dentist

It goes without saying that you want your new dentist to be a good dentist. They should make you feel comfortable every step of the way, from scheduling an appointment to the appointment itself, be it a check-up or a more involved dental procedure. They should consider not only your dental health but also your overall health. And they should have hours, a location, and prices that work for you.

These are some other considerations:

  • Is the dentist accepting new patients?
  • How long has the dentist been in practice?
  • What is the dentist’s approach to preventive dentistry?
  • Do they provide the services you need? (Family dentistry, orthodontics, etc.)
  • Does the dental practice have a payment plan?
  • What is their policy on missed appointments?
  • Does the dentist participate in your dental health plan?

How to Find a Dentist

  • Contact your insurance company to get a list of dentists that participate in your dental plan.
  • Contact your local or state dental society.
  • Ask for referrals from your former dentist, your new doctor, friends, neighbors, and coworkers.
  • Research online and look for dentist reviews from people who have had good experiences.


Moving Tips: How To Find A New Dentist

Whether it’s across town or cross-country, moving means staying on top of big and little tasks. In the flurry of packing, renting moving trucks, changing addresses and all of the other checklist items that come with moving, don’t forget that one of the most important moving tips isn’t how you pack your china, but when and how you choose a new dentist. Switching health care professionals should never be done lightly or without the proper research, so if your move requires a new dentist too, make sure you take the time to choose one you’ll love. Try these tips for a perfect fit post-move.

  1. Look for ADA-Certified

The American Dental Association requires its certified dentists to abide by certain codes of both ethics and professional conduct when dealing with patients. As such, its database is a great place to start when searching for a trustworthy, skilled dentist in your new area. You can find ADA-certified dentists across the country by using the ADA Find a Dentist tool.

  1. Ask for Recommendations

One of the most reliable ways to find out more about dentists in your new area, is to ask around. If you already know some people in your new neighborhood – coworkers or community acquaintances, for example – ask which dentist they visit. If you don’t know anyone in your new location, go online and reach out to others on social media. A city social media group or parenting group can be a wealth of knowledge for someone who’s new in town, and you can rest assured you’re choosing a dentist with a proven track record.

  1. Schedule a Consultation

Before you commit to becoming a new patient, schedule a consultation. During a consultation, a dentist and his or her staff will show you around the office, explain common procedures, talk to you about dental insurance, and answer any questions you might have about policies and protocols. This initial consult goes a long way in quelling any concerns you might have about switching dentists, as well as giving you a feel for whether or not a particular dentist is the right fit for you and your family. Schedule consults with two or three dentists and you can choose the one who you feel is best.

  1. Consider Your Family Members

Consider your family members, like their ages and special needs, to narrow your search. If you have little ones, think about finding a family practice that can handle pediatric dentistry. If your teen (or you!) may need braces soon, check out an office that specializes in orthodontics as well.

  1. Transfer Your Records

Call your old dentist and make sure that your dental records from that office are transferred to your new dentist. Your new dentist will need to know about your past dental health, including checkup records, surgeries and any medications you may be taking. Transferring your records can help make the switch to a new office seamless.


Dental Clinic Near Me: Arranging a “Meet & Greet”

Once you have narrowed your search to 2-3 candidate offices, reach out to see if they will provide a complimentary “Meet & Greet” appointment. A lot of offices do this now and it’s a great opportunity for you to meet staff and Dentist. It’s also a great way to get a “feel” for the facility.

I find that patients get the most out of these meetings when they bring a few questions. They may also have a dental problem or concern and will use the appointment to get a second opinion. When you bring a question or concern to the candidate Dentist, you get to see how they think. Also, you will be able to see if their priorities and ways of thinking are similar to yours. And, furthermore, you’ll get a feel for their style. Do they like to listen a lot? Do they ask you lots of questions while giving you the opportunity to speak and share ideas? You’ll find this out easily if you plan ahead and bring questions with you.


Figure out Your “Must-Haves”

Remember: it’s not “just the dentist.” Before you start searching, think about the criteria that matter most to you. How important is the location? Many people prefer their dentist to be close to home, work or their child’s school. Having a dentist close by makes it easier to stop by for an appointment if there’s been a cancellation or if you have an emergency.

What kind of dentist do you want? If you have children, you might want a pediatric dentist who specializes in treating kids. If you use a wheelchair or have difficulty climbing stairs, you might want to visit an office that is handicap accessible. Maybe you want a dentist who speaks another language.


Questions to Ask When You’re Looking for a New Dentist

Before you make an appointment, do a little research. You might find out it’s not worth scheduling an appointment in the first place. Make a list of questions to ask the dentist. It might seem like an unnecessary step, but not all dental offices are created equal and you probably don’t want to waste your time. Some things to ask a new dentist include:

  • Are they accepting new patients?
  • What kind of insurance do they accept?
  • Where is the office located?
  • What are the office hours?
  • What is appointment availability like?
  • Do they offer after-hours, emergency care services?
  • How long has the dentist been practicing?
  • Is the dentist a member of a state or national dental society?

Of course, this is just a sampling of things to consider. Take your time and write down what is really important to you. Keep in mind you might have to visit several dentists before you find one you really like, and there’s nothing wrong with that.

Move Out Cleaning Practices Consumers Can Believe In

When the Tenant Moves Out

You may serve the notice in one of three ways:

in person;

mail the notice by first class mail;

or post and mail if your rental agreement allows for it.

For all notices that are mailed, add an additional 3 days to calculate when the notice will go into effect. For all notices that are posted and mailed, you do not need to add an additional 3 days

If you are renting month-to-month, you must notify your landlord in writing 30 days (33 days if the notice is mailed only and not posted) before the day you move. See Sample Letter 5 in the resource ‘Sample Letters to the Landlord’. You do not need a reason to end the tenancy. Your landlord may agree to accept a shorter notice but is not required to do so. Get the agreement in writing.

You may give the notice on any day of the month, not just the first day of the month or on the day that rent is due. If you have a lease, read the lease carefully to see if the lease requires written notice before you move at the end of the lease term. You may be able to break the lease earlier if the landlord violates the lease terms or the law or you are a victim of domestic violence, dating violence, stalking, or sexual assault.

even if you move out before the 30 days are up, unless the landlord agrees to your moving early without paying. (Get all agreements in writing). If you do not pay, the landlord will probably deduct the rent from your security deposit and might sue you in small claims court if you did not pay a security deposit or your landlord claims that you owe more money than your security deposit. If you move out early, and don’t pay for the full 30 days, the landlord must make reasonable efforts to find a new tenant

You can terminate your rental agreement and the rental agreement of your immediate family members* with at least 14-days’ written notice to your landlord. Your written notice must include verification that you have been a victim of domestic violence, dating violence, stalking, or sexual assault within the last 90 days** or that you have a current order of protection from the courts. The “verification” of your having been the victim can be in the form of:

a valid court order requiring the abuser to stay away from you (such as a restraining order signed by a judge),

a court order of conviction or a police report regarding an act domestic violence, dating violence, stalking, or sexual assault, or

a statement signed by a qualified third party (law enforcement officer, attorney, licensed health care professional, or victims’ advocate at a victims service provider) law enforcement officer saying that you have been a victim of abuse within the past 90 days


Move Out Cleaning

It’s almost time to move out of your home, but you feel a little rushed and don’t have time to clean! Moving is a hassle in itself, so leave the cleaning to us. Whether you are trying to run down your landlords’ checklist to get your security deposit back or getting your home ready for resale

What is Included in a Move Out Cleaning Service?

A move out cleaning typically takes a little bit of extra time because we make sure to get those hard to reach areas that need some extra attention. Then rather than bundling add-on’s together such as: inside the oven, inside the fridge, inside the window etc. – we let you customize your cleaning to your exact needs. You can simply add the extra services YOU need and forget about the ones you don’t!

do ask that you have all of your belongings moved out prior to the cleaning to ensure we can clean everything to our standards. If for some reason you are unable to move everything out, we will clean around the furniture and boxes. However, this is never ideal because once you move those out… the areas will obviously not be satisfactory.


Cleaning and repair rules when you move out

The last thing you probably feel like doing as you move out of a rental is cleaning the place. Like it or not, though, you’re expected to leave it just as nice as it was when you moved in.

If you leave a dirty place for your landlord, they can hold back the cost to clean up from your security deposit. After all, it is your mess. But the security deposit is your money. You want as much of it back as possible, right? So just what are your responsibilities?

Read your lease

Besides typical cleanup duties such as washing the floor or vacuuming the carpet, the landlord expects you to do a thorough job of getting that rental back into shape. Move-out expectations vary, so check your rental agreement or lease to see what the landlord wants you to do.

Common cleanup duties

Common cleaning requests include wiping down baseboards, doorknobs, and light switches; dusting ceiling fixtures; washing the windows; and thoroughly cleaning appliances. Some landlords may expect a professional carpet cleaning as well. It’s definitely worth your time to read every move-out detail in your agreement, as some landlords levy extra fees if you don’t take care of an item on the list or if you don’t do it within the specified time frame.

Repair damages

Even minor damage to the rental must be repaired before you hand over the keys. A couple of nail holes may not seem like much to you, but if you don’t repair them, the landlord has to. That means they can bill you in the form of a deduction from your security deposit


Guide to Apartment Cleaning for Moving In or Out

Whether you’re just moving in or about to move out, you might not have thought about an important factor for both: cleaning. Cleaning before or directly after you move in might not be your biggest concern, but cleaning your rental space before moving out could help ensure return of a security deposit. Read our tips and checklists below to make sure your apartment is sparkling:

Moving In

Cleaning can be tricky during the move-in phase. Depending on when your lease starts and when you physically move into your space can determine a lot. If you have a few days in between the two, take the time to visit the apartment and do some overall cleaning and double checking of appliances, faucets and other things that might need attention before you begin using them. If you notice something that wasn’t a problem during your walk-through, or if you didn’t have a walk-through, be sure to contact your landlord or property manager to ensure it’s fixed before your official move-in.

Before Move-In Cleaning Checklist

Vacuum and/or steam clean carpet

Lightly wipe down surfaces

Clean bathtub and toilet

Open a window (weather permitting) to allow fresh air in

Check vents and air filter

Check faucets for potential leaks

Clean refrigerator and freezer

Moving Out

While moving in can be less stressful when it comes to cleaning depending on how tidy you are in general, cleaning when moving out can determine whether you get your full security deposit back or not. Follow the checklist below to make sure you leave your space in good shape for the next renters:

Moving Out Cleaning Checklist

Vacuum and/or steam clean carpet

Double check for potential stains on carpeting and remove best as possible

Remove all nails, staples and hanging strips from the walls

Remove scuffs from the wall using a magic eraser

Remove all food and trash from the apartment

Cancel all utilities for that specific rental

Do a move out inspection with your landlord to discuss any, or lack thereof, damages


MOVE OUT CLEANING

MOVE-OUT CLEANING CHECKLIST

Kitchen Cleaning

Oven and Inside Fridge have to be cleaned if a deposit is held.

Inside/Outside and top of fridge (if Selected)

Stove top and Oven  (if selected) (Self cleaning ovens take 3 hrs to clean and 2 hrs cooling down)

please run self clean cycle the night before we are to clean

Polish stainless steel appliances. (if you have them)

Inside and outside of cabinets and drawers.

Clean light switch plates. Wash baseboards.

Wipe down door facing and frame. Sweep/mop floor.

Bathroom Cleaning

Tub, shower, shower doors and door tracks

Clean sink, toilet. Inside and out medicine cabinet/mirror.

Clean vanity, under the sink, and drawers.

Wash  windows sills, and ledges.

Clean light switch plates. Wash baseboards.

Wipe down door facing and frame. Sweep/mop floor.

When you move out of a rental apartment, the biggest priority is getting back your deposit. Landlords require a deposit before you move in .Your deposit will either be subtracted for any necessary repairs after you leave or will be fully reimbursed to you if everything is in the same shape as when you moved in. To get back your deposit, it’s important to take good care of the home while you’re living there. When you move out, it’s just as important to give it a good, deep cleaning, even if you have maintained it well over the course of your stay.

Fighting Mosquitoes In The Great Outdoors

Natural Ways to Get Rid of Mosquitoes

Anyone who lives in an area where mosquitoes are prevalent feels the constant struggle of trying to find effective ways to mitigate them. And although these insects can cause numerous fatal diseases such as malaria, dengue and yellow fever, most people just suffer the typical symptoms which are itchy mosquito bites. These are both annoying and irritating.

Store-bought mosquito repellent products can help reduce your chances of getting bit, however they’re filled with chemicals that aren’t good for you or the environment. If you’re looking for natural ways to get rid of mosquitoes, look no further! We know it can be difficult to keep bugs and insects out of your apartment.

Camphor is a natural home remedy that will assist in getting rid of mosquitoes around your house or apartment. Its strong odor drives mosquitoes away. All you have to do is close all of the doors and then light camphor. After about 30 minutes, you’ll notice that you won’t find any mosquitoes.

Garlic is made up of several properties that help keep mosquitoes away. To test this method out, you can crush a few cloves of garlic and then boil them in water. Then, you’ll want to pour the solution in a spray bottle and spray it around your room, garage, etc. To your surprise, this solution made up of garlic will kill mosquitoes instantly. And the scent will dissipate to your nose within minutes, so no need to worry of your home reeking of garlic

You won’t have to look too far to find this one! Almost everyone has coffee grounds in their apartment and it just so happens to be one of the home remedies for getting rid of mosquitoes. Stagnant water increases the number of mosquitoes around, so all you need to do is pour coffee grounds in the stagnant water around your environment. Mosquito eggs will come up to the surface and die due to not having any oxygen.


The Best Ways to Get Rid of Mosquitoes

Mosquitos range from being a nuisance to carriers of diseases such as malaria, West Nile, dengue, Zika, and more. There are many ways to get rid of mosquitoes, from insecticides to natural and organic options. For example, if you’re not comfortable with bug zappers, you can use natural repellents, and if you prefer to not use DEET, you can create essential oil sprays.

There are many ways to get rid of mosquitoes, but they aren’t all equally effective. The This Old House Reviews team has rounded up the best ways to get rid of mosquitoes, all in one place. In this guide you’ll find tips on removing them from both your house and your yard.

Mosquito Basics

Before we get into the methods for eliminating mosquitoes, let’s go over a few mosquito basics. For starters, there are over 3,000 species of mosquitoes, with roughly 200 species in the U.S. alone.

It’s a common misconception that mosquitoes suck blood for food. They’re not technically parasites, because they only suck blood to nourish their bodies so they can lay and hatch healthy eggs. Mosquitoes can lay 100 eggs at a time, so populations of this pest can get out of control quickly. When eliminating mosquitoes, it’s key to use multiple methods, since not all approaches kill mosquitoes at every stage of the life cycle.

It’s also important to note that repelling and killing mosquitoes aren’t the same thing. Repelling mosquitoes will keep them away from you by making you less attractive to them (they’re attracted to the carbon dioxide from our breath, elements of our sweat, and maybe even beer, according to some studies).


How to Get Rid of Mosquitoes

Getting rid of mosquitoes in the yard during warm seasons will usually include sanitation, treating standing water and liquid insecticide applications every 30-60 days. Following the treatment plan will help keep mosquitoes to a minimum and will allow you to use your outdoor areas without constant mosquito bites. While it is unrealistic to expect 100% control of all mosquitoes, you can expect to reduce the mosquito population to a manageable level that will allow you and your family to enjoy your yard.

During the mosquito inspection you likely found many water sources where mosquitoes can lay eggs and develop. In all places where it is possible, such as flower pots, pet dishes, rain gutters, bird baths, etc water should be emptied frequently to prevent mosquitoes from breeding there.

In areas where you cannot control water collection you do have another option, larvicides. Larvicides work to stop these aquatic immature mosquitoes from maturing into biting, breeding adults. Containerized ponds, animal watering troughs, flower pots and other areas that do not have flowing water or water that can seep into the ground or into other bodies of water can be treated with larvicides as well. How often you apply the larvicide will depend on the product chosen and the amount of rain in your area

There are different types of larvicides. One type is an insect growth regulator which bombards the developing larva with a juvenile growth hormone mimic that stops the larva in young developmental stages to prevent maturity. The second type of larvicide contains a special bacteria that affects the larva’s ability to eat. Larvicides also come in different formulations. You can use solid dunks or bricks, water soluble packets or granules. Which larvicide you choose will be based on the areas you are treating so it is important to read the product label prior to purchasing the product.

Monthly insecticide spray applications in the yard will greatly reduce the number of biting adult mosquitoes. There are many concentrated insecticide products that are labeled for mosquito control so it is important to choose one that is labeled for use on the areas you plan on treating. You may have noticed more mosquito activity in the morning, early afternoon and again after the sun goes down but not so much during the middle of the day.


How to Get Rid of Mosquitoes Forever

The mosquito is a tiny insect but a large trouble maker. Throughout history, mankind has seen the devastation caused by them and most people would like to get rid of mosquitoes and be free of their itching bites. Today there are hundreds of different types of mosquitoes found in different parts of the world. Of the nearly 3400 species of mosquitoes prevalent today,

The Aedes mosquito is a deadly species known to be a vector of many diseases including dengue, yellow fever, as well as lymphatic filariasis. It is invasive and difficult to manage, so pest control is of utmost importance. Worry not, because I will be here to guide you throughout the process and show you how you can get rid of mosquitoes from your home and outdoors, and protect you and your family from their bites, which can potentially be dangerous

What are mosquitoes?

Mosquitoes are tiny parasitic insects that bite animals and humans. Female mosquitoes are the ones to bite and spread deadly diseases. These blood meals help them reproduce and make eggs. On an average, an adult mosquito has a lifespan of 2 weeks to 6 months, depending on environmental factors like how warm and moist their environment is. It also varies between different species. Factors like predators (and anyone trying to get rid of mosquitoes) will naturally also affect their lifespan.

A deeper understanding of the type of pest you are dealing with will help you get rid of mosquitoes more effectively. Here are the different stages that a mosquito goes through in its life cycle.

Mosquito eggs

A single female mosquito can lay between 1000-5000 eggs in a lifetime, usually near standing water bodies, stagnant pools and ponds or containers with stale water.


How to Get Rid of Mosquitoes: The Ultimate Guide

When the temperatures start rising, we know that summer is well on its way. Unfortunately, warmer weather isn’t the only indication that summer has arrived. Mosquitoes are nuisance creatures that thrive in moist, humid climates, making summer their favorite time of year. To help you with all your mosquito problems, we wrote the ultimate guide on how to get rid of mosquitoes

When mosquitoes start to make their presence known, every homeowner gets busy trying to think up ways to get rid of them. Whether you make use of a home remedy, clean up potential breeding grounds around your yard, or contact a professional pest removal company to rid your home of mosquitoes, it is possible to greatly reduce the population of this annoying insect. How do you get rid of mosquitoes? Read our ultimate guide to learn more about how to bid summer’s least favorite winged creature a not-so-fond farewell.

How Long Do Mosquitoes Live?

If you’ve got a mosquito infestation brewing in your backyard, how long mosquitoes can live is probably at the top of your list of questions. Most mosquitoes do not reach their projected lifespan as they are often eaten by other predatory animals or are killed by humans.  The complete life cycle of a mosquito from the egg stage to death from advanced age is between one to two months. However, few ever live to enjoy old age. To properly understand the average life expectancy of a mosquito, it is helpful to be familiar with each stage of the insect’s circle of life.

The egg stage

Female mosquitoes require blood to remain healthy enough to reproduce. Hence, it is this strong desire to propagate the species which promotes the need for a meal of blood to prepare the female to lay eggs.

The larval stage

The next stage of life occurs when the eggs have hatched. The mosquito larvae are quite tiny, measuring only ¼ of an inch in length. At this time in the mosquito’s life cycle, the insect does not yet have wings. Their small thin bodies are worm-like in appearance and covered in hair. Even at this tender age, the mosquito’s main body parts are already clearly formed including the siphon-like appendage which stems from the torso, and that is used to suction blood in an adult mosquito. Its primary role is to permit proper respiratory function at the larva stage.